


When you start learning to play the violin, usually your teacher will tune your violin in your weekly lessons. If you are learning at home, via the internet, or simply can’t get anywhere to have it tuned, here is a little guide to help.
Why does my violin go out of tune?
There are a few different reasons why your violin may be out of tune. But, don’t worry - it really isn’t unusual for violins to go out of tune - it’s a part of daily violin life.
If you’ve fitted new strings to your instrument, they will take some time to stretch and settle. With most modern violin strings this is usually fairly quick, one or two days, but strings with a synthetic core or gut will sometimes take a week or two to settle. If you want to speed up the stretching process, practice and play! You’ll just need to tune more frequently.
Weather can have a massive impact on your strings and instrument. Even a small change in atmospheric pressure can do it. So can a change in humidity, especially when the air dries out. For us in Brisbane, we see a spate of broken strings and even broken bows at the end of Autumn and through early winter, when we have a really dry period. Remember, the violin is made from wood. Actually, more than one type of wood. Wood expands and contracts with the weather, just as your front door can sometimes be sticky and sometimes might not even stay closed. Learn more about how a violin is made.
Bumps. If you have accidentally bumped or knocked your instrument against your stand, chances are you’ll need to re-tune your violin. If it gets dropped or bumped hard, you will find the same thing. Carrying the violin in your car boot can also deliver jolts that are unhelpful.
(An extra note: If your violin is bumped or dropped, sometimes the soundpost can move or fall down. If it falls, loosen the strings immediately, don’t play the violin, don’t pass go - but do bring it into our Makers Studio or to a luthier near you ASAP to be re-fitted correctly. All sorts of damage can occur to the violin if you don’t.)
Read everything you need to know about your violin soundpost here.
Where do I start?
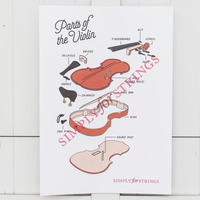
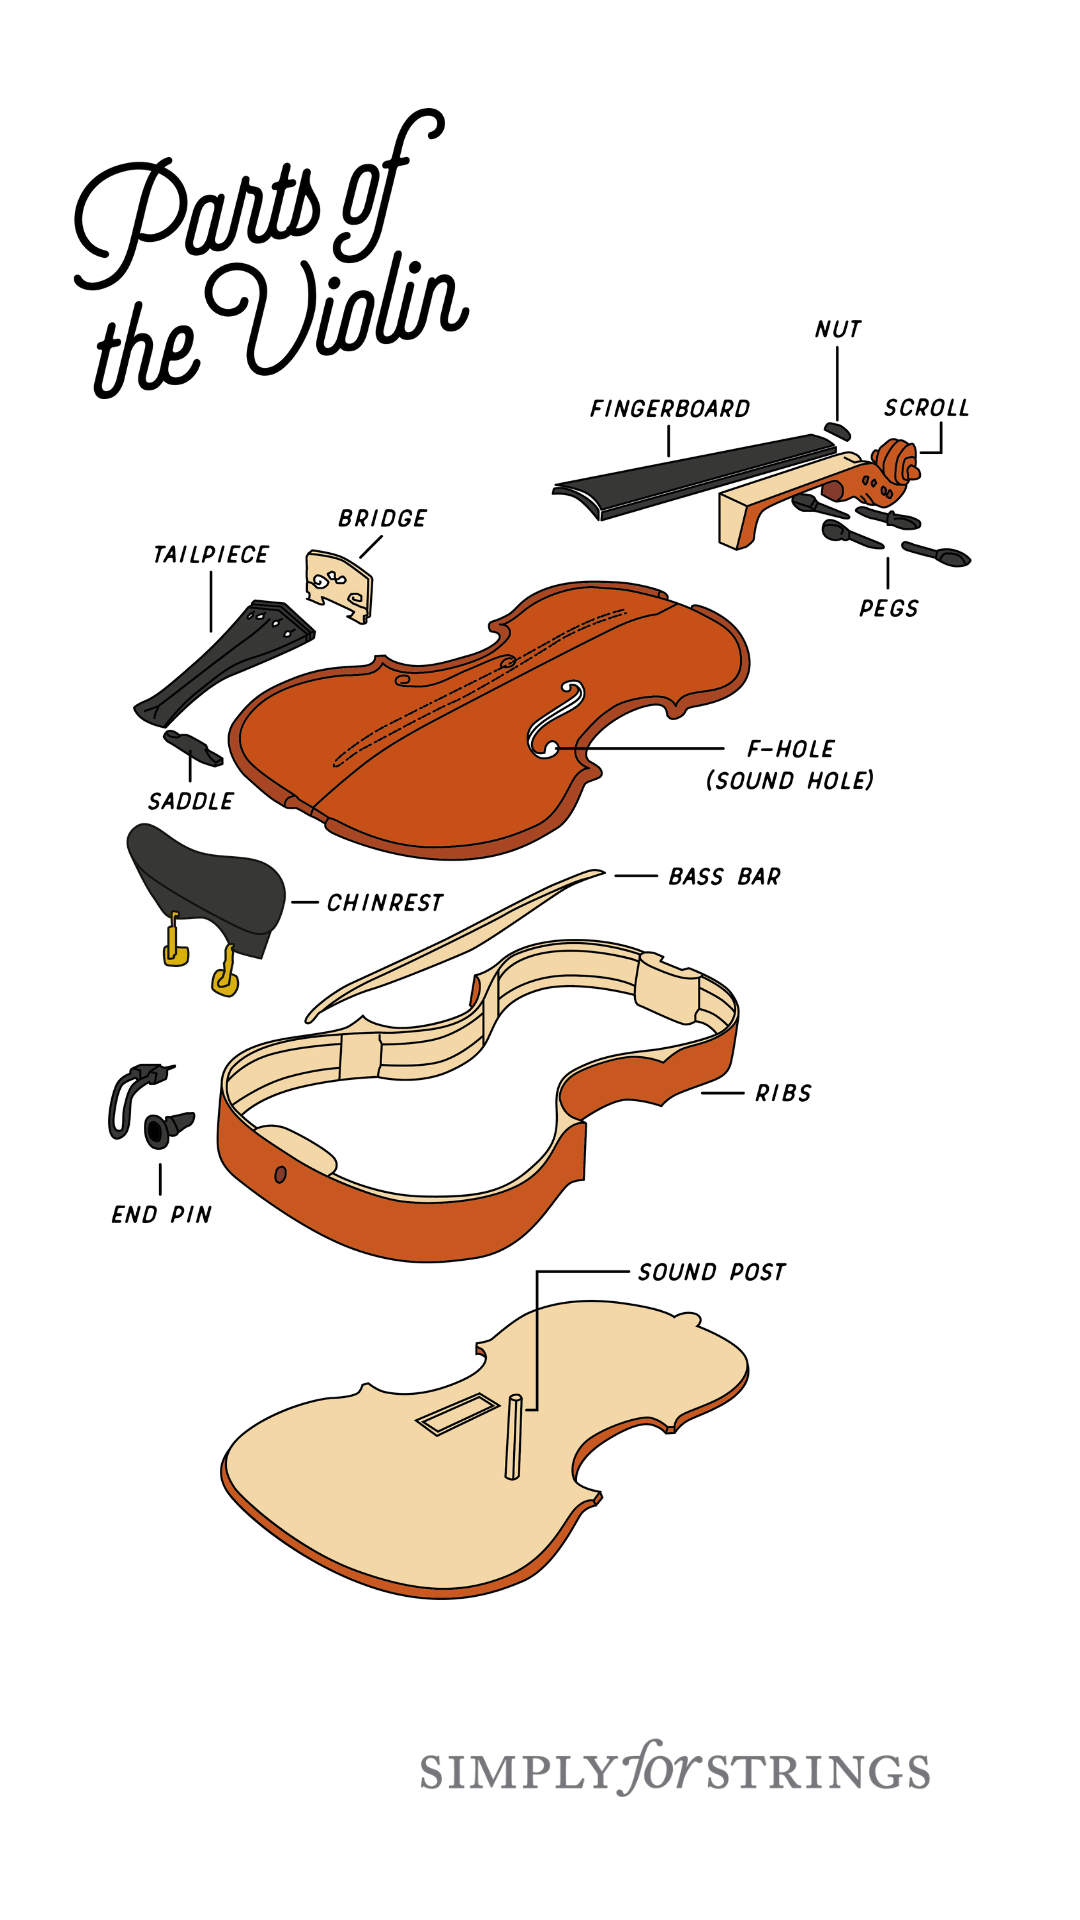
Your violin will most likely have two sets of tuning devices: the pegs at the top of the instrument and the fine tuners, or string adjusters as they are otherwise called, at the bottom, as a part of the tailpiece.
It’s important to be very careful when tuning or fitting strings. All strings, regardless of brand, are sold without a manufacturer’s warranty. This is due to the number of variables that can cause a string to weaken, unravel or simply snap. We’ve added some basic tips below to help with preventing some likely causes of breakage.
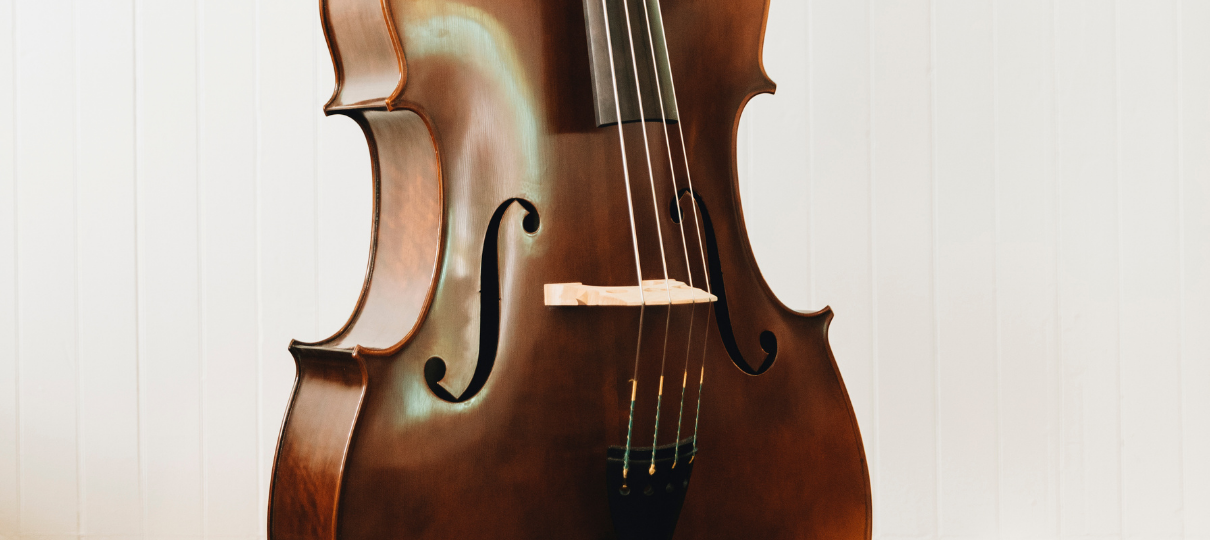
When tuning we also need to keep an eye on the bridge. Changing the tension of your strings, up or down, also changes the pressure on the bridge. It is costly to replace and can last several years in perfect shape only if we maintain it correctly while tuning. More on this later.
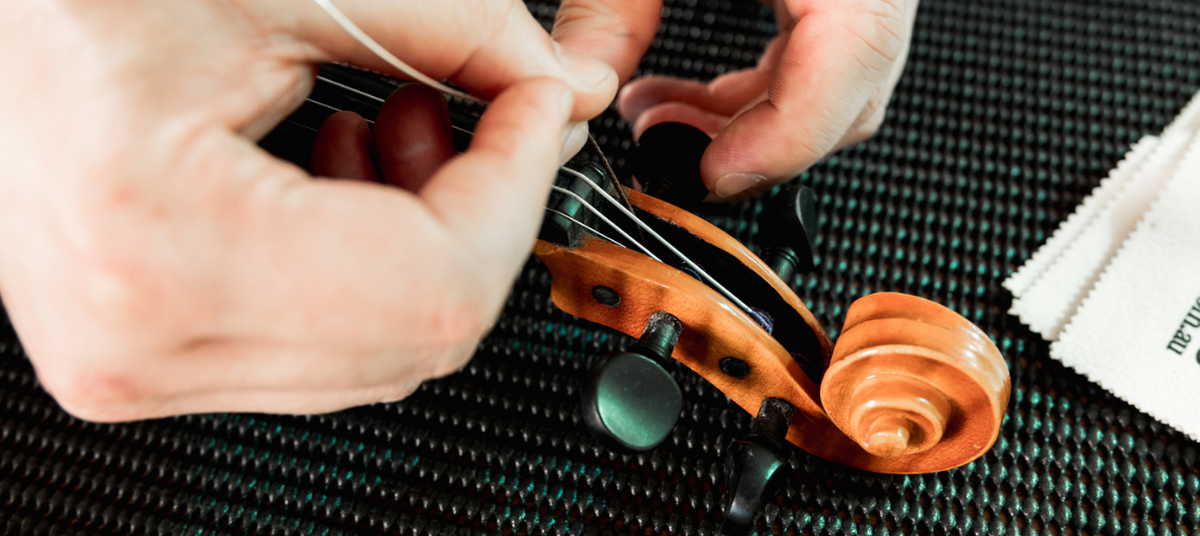
How to use your violin pegs
At the top of your instrument, the strings come up the fingerboard and over the nut (a raised piece of ebony with grooves carved in it) and into the pegs, in the peg box. Each string is threaded through a hole its respective peg and winds around the peg as we tighten it. We turn each peg so the strings come over, not under it. Pegs are tapered, matching their holes in the peg box, and are secured by carefully pushing into place and wedging them in with the pressure of your hand.
Using the tuning pegs can be a little bit overwhelming and tricky at first, but our number one tip is to take it slow and steady. It is easy to overtighten the string by tuning too quickly, so you want to avoid going too quickly. Using the pegs slowly and gently will ensure you don’t cause any unwanted damage to your strings or peg box. For these reasons, it is normal for the pegs to only be used if the string has gone too far out of tune for the fine tuner to correct.
How to use fine tuners
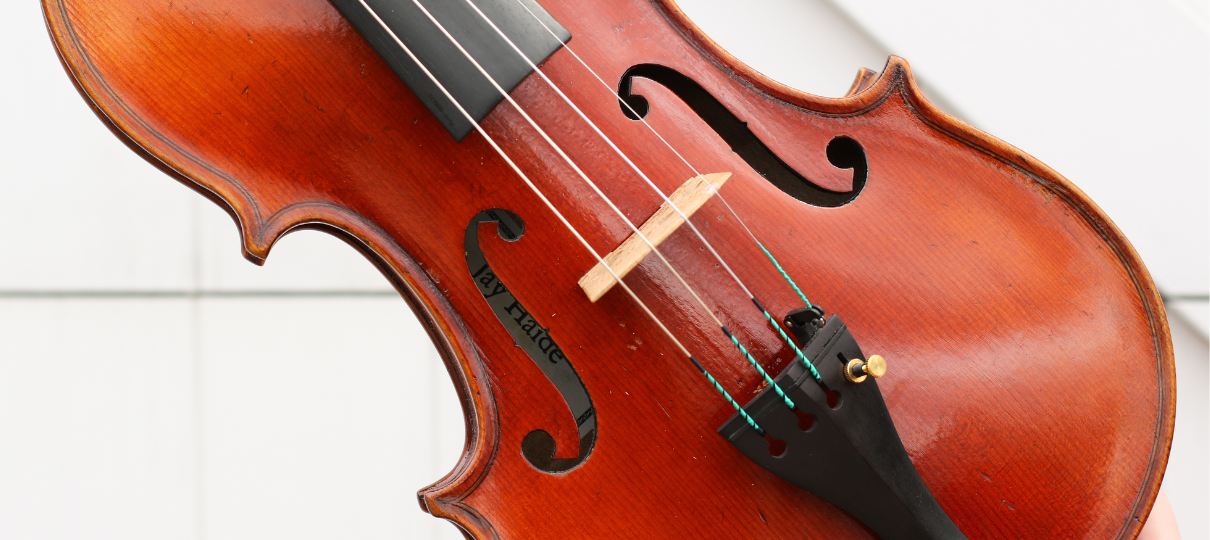
The bottom end, or the ball end, of the string comes all the way down the fingerboard, over the bridge and fits into a claw in the fine tuner (or string adjuster) which is fitted at the top end of the tailpiece.
The fine tuners are simply adjusted by turning the screws: clockwise raíses (sharpens) the pitch by tightening the string; anticlockwise lowers (flattens) the pitch by loosening the string.
Tuning with these screws is the safer option, and the one normally used for everyday tuning unless the peg has slipped and your string is too loose.
How to check if your violin is in tune
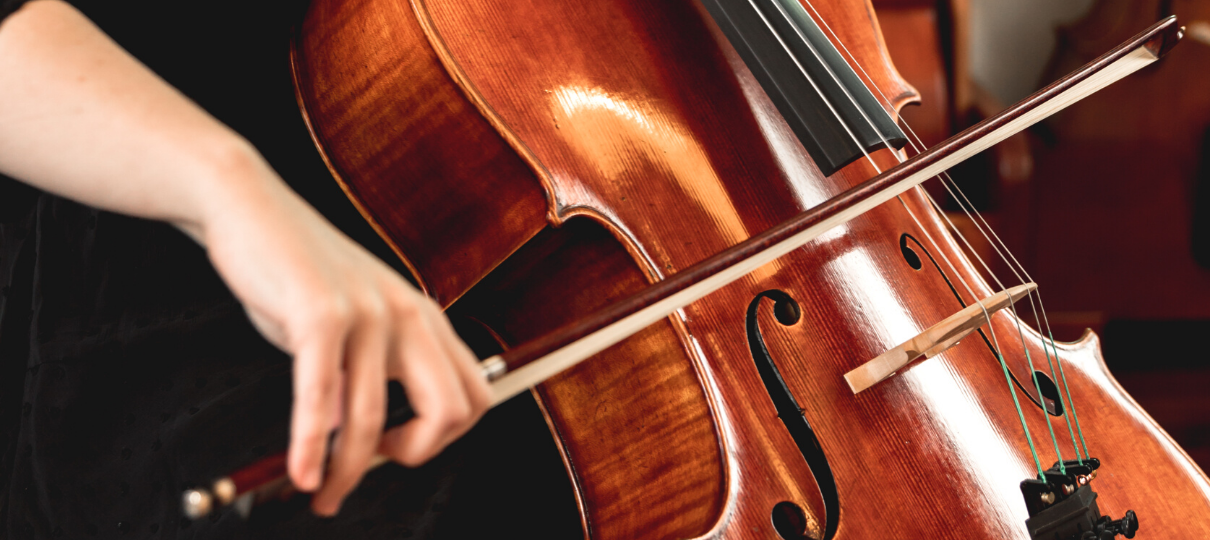
Ideally, you should bow a long, clear note; not too loud as that can sharpen the pitch, but not too soft either. If you are tuning for a child and don’t know how to use the bow, just pluck the string about halfway down the fingerboard: again, not too hard or too softly.
If you are musically trained, you can check the note against a piano, keyboard, tuning fork, pitch generator (often found on electronic metronomes) or even a pitchpipe. Otherwise, it’s very easy to check the pitch using a chromatic electronic tuner or a tuning app on your smartphone, tablet or computer.
Using an electronic tuner or tuning app
Unless a particular string is loose to start off with, we recommend starting with your A string and working your way down through D then G, then back up to the E string. (This is how professional orchestras tune!)
The dial on your screen will show the pitch you just played. If you pluck the A string and it is actually in tune, it will show a digital letter A and the light will go green (usually it’s green).
If your string is slightly sharp (too high) it will be red or orange and will show some bars to the right. You will need to turn the fine tuner screw anticlockwise and pluck again until the light goes green. But it still must say that the note is A.
If you are too sharp, it might think you are playing A# or even B; if you’re too flat it could say assume you’re tuning to Ab or G. If the note is too far out of tune for the fine tuner to correct, we then use the pegs. You’ll need to make sure you’re using the right peg to adjust the tuning.
First, loosen the fine tuner at the bottom by turning the screw anticlockwise until you can feel that it is almost loose. Hold the peg steadily, and turn it downward to loosen the string first. Sometimes the string can be stuck to the grooves in the nut or the bridge, and immediately tightening could cause breakage. That’s why we recommend loosening it first.
Now twist the peg gradually to tighten it, plucking it frequently to ensure you don’t overtighten it.
When you reach the approximate pitch or just below it, carefully push the peg into place so it wedges in and will not slip out. You’ll need a little bit of pressure to ensure it stays in the position, but be careful: the sides of a violin pegbox are relatively thin. While you need to push the peg in firmly to secure it, don’t be too rough. Check the tuning again, and use the fine tuner to bring the note up to the exact pitch according to your electronic tuner. Follow these steps for each string.
If you know how and have a trained ear, your final tuning check should be comparing the fifths: E&A together, A&D, then D&G.
NB: If your violin was quite out of tune to start with, it’s likely that you’ll have to go through the whole process two or three times. This is because your strings are likely stretching and settling, and large changes create extra twisting on the bridge. Which brings us to the importance of checking your bridge during the tuning process!
Shop our range of Metronomes & Tuners with speedy delivery Australia wide.
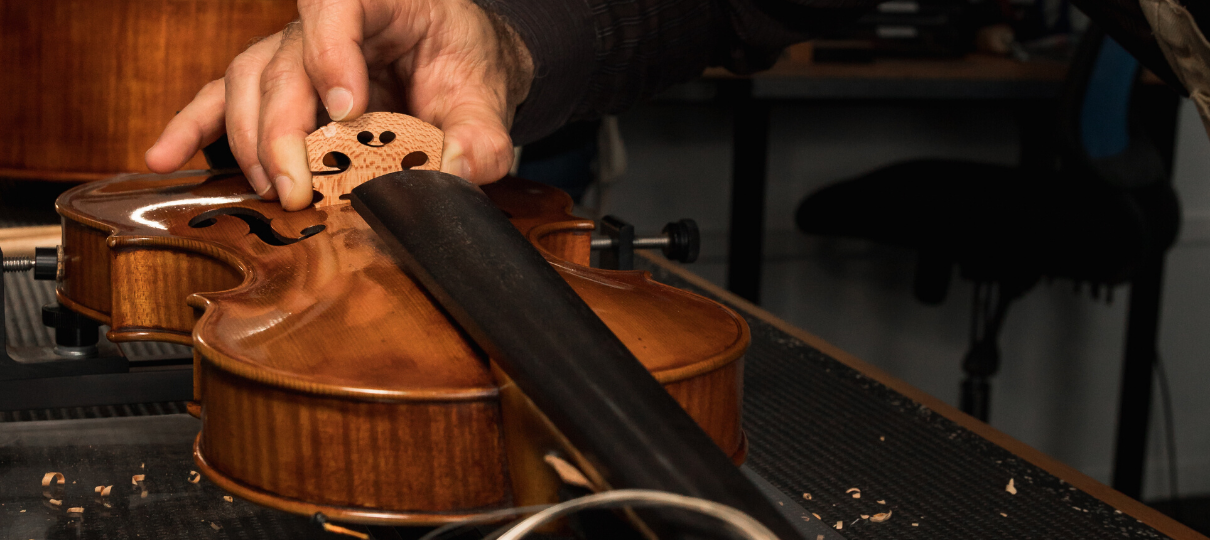
Checking your bridge
Tuning can change the balance of string tension on your bridge. Bridges can develop an unhealthy curve or warp, usually towards the fingerboard, but sometimes back towards the tailpiece. Sometimes they can even twist out of shape!
During and after tuning, you should check first that the feet of the bridge are staying flush, properly planted flat on the belly of the violin, and then make sure the top of the bridge is not bending while you tune. If it starts to move, you can try to straighten it with your thumbs on one side and fingers on the other. Just be careful to not flip the bridge over!
If you have any problems with this, don’t proceed: call, email, Facebook us for advice or bring your violin to us and we will help you. We’ll show you how to tune and check your bridge safely at home too.
Get in touch with the string experts.
Protecting the strings
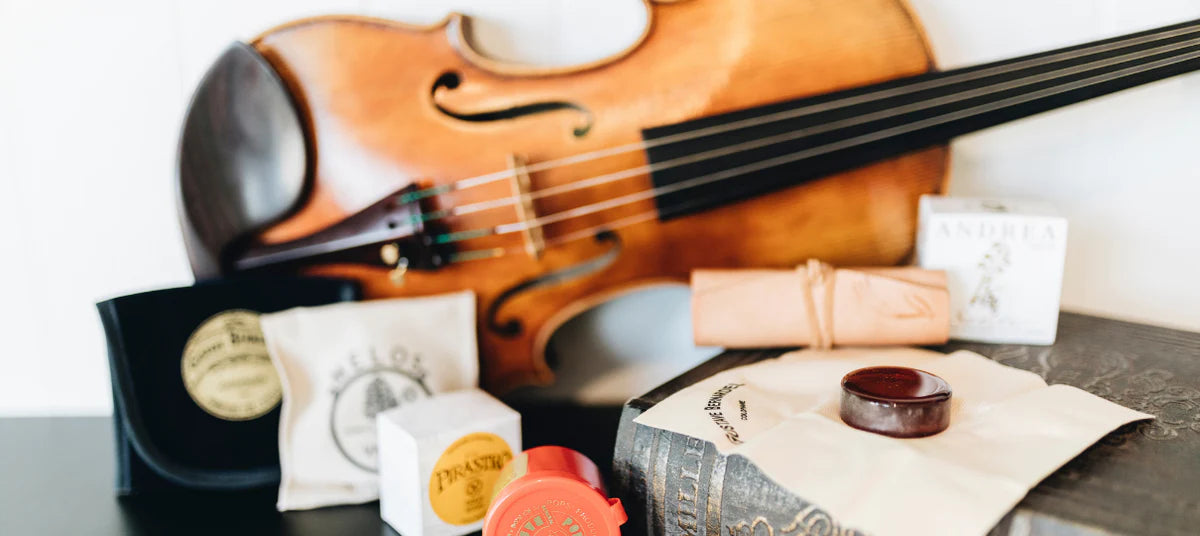
Always keep your strings clean. They will last longer and perform better. Usually, all you need to do is wipe them with a firm but soft cloth after playing. If there is a lot of heavy rosin build-up you can use an isopropyl alcohol wipe on the worst spots, but don’t let it touch the varnish on the violin body. (Don’t use alcohol if you play with gut strings.)
If your E and A strings have small string protector tubes on them, make sure the tube sits neatly in the bridge groove. These have three purposes: to protect the string from damage from dragging over the bridge; to stop these very thin strings from cutting into the wooden bridge, and with the E string they are designed to help reduce the chance of developing an unpleasant whistle.
Make sure you don’t bump the strings on anything - eg your music stand. We often see strings with small indentations caused by such bumps. These strings will eventually unravel and break.
Cut your fingernails often. Fingernails can cause damage to the strings. You need short nails to play a stringed instrument.
If you have the opportunity to check (because a string has become too loose), have a look at the nut and bridge grooves. They have probably been lined with graphite but it won’t hurt if you use a soft pencil (2B or softer) to line the grooves before you replace the string. This helps lubricate the groove, protecting the string from extra drag, and protecting the wood from damage by the string.
Some extra tips
If the fine tune screws are stiff, remove one at a time, clean and lubricate with a little WD40 or similar. Just make sure you don’t spray any WD40 near your violin.
If the pegs slip too frequently or are very hard to adjust (eg make a clicking sound or just stick too hard) they might need to be wiped clean and have some peg paste applied. Peg paste smooths the surface of the peg and aides in preventing them from sticking. If you find that the peg paste isn’t effective, we recommend having a luthier take a look at your pegs - they may need to be replaced so you can have a set of pegs fitted perfectly to your instrument.
Keep your strings and the body of your violin clean. Strings last longer and sound better if they are well-maintained. If the body has too much rosin and grime built up, your annual service will cost more because it takes longer to complete. Daily use requires a simple wipe afterwards with a soft cloth.
It’s good to use a quality violin polish to replenish the timber, especially the front of your instrument. The top is made of spruce which can crack if it gets too dry, which is why we see a lot more instruments with cracks on the front than on the back. Give your violin some TLC all over each month and protect your investment.
Shop our range of Instrument Care & Cleaning accessories.
If you have a beginner model violin, have you upgraded the strings? Did you know that strings can make a huge difference in the sound, in the violin’s responsiveness to your bowing and in the dynamic range? Your whole learning journey can be made much more satisfying by fitting better strings. Beginner models usually have very basic steel strings as supplied by the factory. If you upgrade strings with us, we’re always happy to fit them for you at no extra cost.
Learn more about improving the sound of your instrument.
We hope this information helps you to tune your violin! If you have any further questions, we’d love to hear from you.