

The construction of the cello demands a large amount of time, concentration and years of mastery.
How a cello is made - every part by hand
A cello takes an expert, trained craftsman approximately 200 to 300 actual labour hours to make. But, this doesn’t take into account the whole process. In between tasks there will be waiting time, such as when parts have been glued, or during the varnishing process. This can add days and even a couple of weeks to the project. Below are some of the steps luthiers follow to craft a cello.
To begin with, the mould is made. This framework is used as a guide for shaping and sizing the body parts, and is also used for securing the body during its gluing process. It is made to the exact internal measurements of the cello, as the ribs are fitted to this for setting in their final shape. Templates are also made for use in shaping the back and top plates.
Once the mould is made, the four corner blocks and two end blocks are cut, then shaped to fit their location on the mould. Six ribs are cut to dimension and bent into shape, very carefully using heat to soften the wood just enough to bend without fracturing it. A heating iron is used in conjunction with a bending strap.
The ribs are assembled and glued together with the blocks, then secured to the mould by a combination of clamping methods and left for the glue to set. The linings are now cut to size, bent on the heating iron and when the ribs are set, the linings are glued in place. They provide the extra support needed to secure the ribs to both back and top plates. When all is set, the edges of the sides are made perfectly level with planes and sanding. The special glue used by luthiers, throughout the making process, is called hide glue.
Back and top plates
The backplate is usually made from two blocks of wood, joined together. They must be carefully matched so the flame and grain align as closely as possible because this affects the flow of soundwaves. Once the pieces have been matched, the next step is to cut the basic shape to fit to the template. The back and top plates are measured to fit the sides, not vice-versa. Both plates are hand-carved using gouges, planes and various other hand-carving tools.
Correct arching of both plates is very important for strength as well as sound production. The plates start very thick (approx 25mm) to allow for this arching. Thickness gauges are also used, because the plate is not just one thickness. It is thicker and thinner in parts. The plates are also tested for resonance. The spruce top plate is considerably easier and quicker to shape than the harder and more unpredictable maple back. This is a very time-consuming task and requires great concentration. One simple mistake and the very expensive piece of wood becomes useless!
When the bottom plate is ready, it is glued to the sides and clamped until it is set. The f-holes are drawn in place and then cut in the top. When the top is ready, the bass bar is cut and shaped to fit, then glued into place. When ready, the top is glued into place. All edges and corners are trimmed and made straight, ready for the purfling tool. The purfling channel is carefully cut first with the purfling tool, then completed with gouges and chisels. Purfling is bent into shape on the heating iron and fitted into the the channel, then glued into place. Further trimming and shaping is carried out: the purling, the edges and both top and back plates.
Neck
The neck, complete with pegbox and scroll is roughly cut out of a large block of maple, then hand-carved using a variety of tools including planes, chisels, scrapers and others. The nut is glued in place - just a blank at this point. It will be shaped later. The fingerboard is attached with very weak hide glue. It will be removed for the varnishing stage.The neck is now very carefully fitted to the body. This is typed quickly but in reality is a very careful process that is fraught with danger: there’s cutting involved on the cello, and the neck must be set at just the right angle, allowing for some movement in the cello’s first year of use.
Varnishing
Most luthiers use their own recipe of varnish. Varnish is made to the luthier’s preferred recipe and is very individual. Many will add “dirt” of various types to create their own distinctive colouring. There are several coats and the recipe can vary along the way, with light sanding - wet or dry - in between. Pigments and other colouring will be added along the way, sometimes with a brush or cloth, sometimes literally by hand!
To begin the varnishing process, the fingerboard is removed. The cello is left in the sun, or in a light box, for a week or more, to allow darkening of the wood. It’s then exposed to ammonia fumes to help darken the wood further. Next, the wood is sealed with a rather toxic varnish preparation made by the luthier. After several days’ drying time, the surface is lightly sanded to smooth out imperfections and prepare for the next stage of varnishing.
The high gloss is removed carefully using oils and various grits including finely ground pumice. The final coat is referred to as “finishing varnish”. Final polishing is done with alcohol on a rag. The rag must not stop moving or the alcohol will remove some of the fresh, newly-dried oil varnish.
NB: You may have noticed your cello neck hasn’t been varnished like the body and scroll. That’s not a mistake, just the traditional way. After all, after a few years of playing, your thumb would wear some of the varnish off unevenly and it would look unsightly!

Professional Set Up
At this stage, the cello is now ready to be professionally set up by the luthier for playing. Each luthier has their own tricks and methods of achieving the perfect set up to compliment their beautiful instruments.
Firstly, the saddle is attached to the bottom front of the body. The fingerboard is re-attached, using a weak mix of hide glue so it can be removed in the future for repairs if necessary. A scraper is used to smooth the sides of the fingerboard and make it flush with the neck. Light sanding takes place, wetting the neck during the process to raise the grain, then sanding again when it’s dry. The neck is sealed with oil repeatedly over a few hours of work. Some luthiers use Linseed, tung oil or similar. When it has dried (several days) the neck is polished with pumice and buffed with a cloth. The nut is removed and the fingerboard planed to give the correct “scoop”.
The fingerboard is then sanded and sealed with linseed oil, then lightly sanded again. The nut is glued back on the neck (to onto the fingerboard) and shaped correctly (even this is a big job in itself). The string grooves are cut and smoothed in the nut. They must be set at the correct distance from each other and on the correct angle for each one - if the grooves are not cut correctly, it will affect the intonation and harmonics of the strings. They are not cut straight down through the nut, but should be arched. Then, peg holes are reamed, pegs are shaped and fitted.
A soundpost is then cut from a dowel made out of spruce. This dowel must be of tonewood quality, because it carries sound from the front to the back. It is shaped at the top and bottom to match the arching of the front and back. The soundpost is then fitted in its correct location.
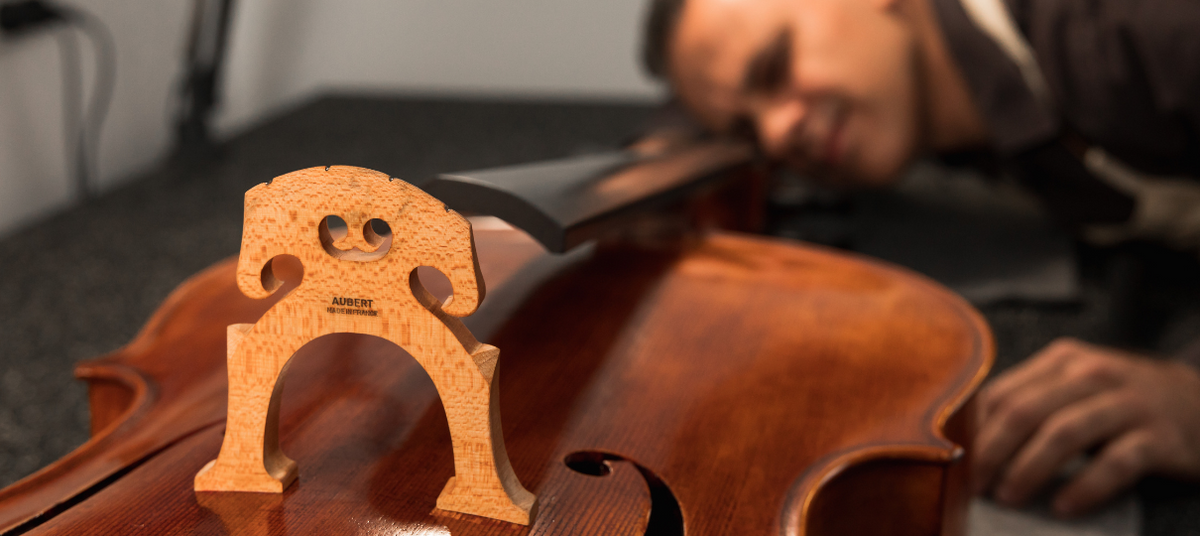
A bridge is shaped to suit the specific measurements of the cello. Again, shaping and wood quality are crucial here. The feet must sit exactly flush on the arched surface of the cello. The bridge must be trimmed and shaped correctly. The bridge is placed in position and the tailpiece, endpin and strings attached. The tailpiece nylon will be adjusted so the tailpiece sits in the best spot for healthy vibration of the strings. If fine adjusters are required, they are fitted to the tailpiece. Or the tailpiece may be a cast metal one with inbuilt tuners. After fitting the strings, the string height will be checked and any adjustments made to the bridge. After all of these steps, the cello is now ready to play!
Your cello is made up of more than 70 parts. Here’s a basic list of the main items:
Components:
Cellos can be made out of different timbers, and some are made from aluminium or carbon fibre. Most luthiers and even larger factories still prefer to use the traditional standard maple, spruce and ebony combination. Here are the main components listed with their usual preferred materials.
Body:
- Sides:
Ribs (maple; 3 pieces for each side, approximately 2mm thick)
Blocks (spruce; 4 corner blocks for the C bouts, and 2 larger end blocks)
Linings (spruce or willow, 4mm thick)
- Top & Bottom:
Top plate (maple; two pieces “bookmarked”)
Bass bar (spruce)
Saddle (ebony)
Purfling (maple, ebony, pearwood, carbon fibre, various preferences)
Body Accessories:
- Endpin (ebony plug, shaft either wood, metal or carbon fibre; metal screw)
- Tail gut or tail nylon
- Tailpiece (ebony, cast alloy or carbon fibre)
- Fine adjusters/tuners (metal, either attached onto tailpiece or inbuilt)
- Soundpost (spruce)
- Bridge (maple)
Neck: (The neck, pegbox and scroll are carved from one piece of wood)
- Neck (maple)
- Pegbox (maple, carved as one piece with the neck and scroll)
- Scroll (maple, carved as one piece with the neck and pegbox)
- Fingerboard (ebony)
- Nut (ebony)
- Pegs (ebony, sometimes we use “fine tune pegs” with hidden gears inside and made to look like ebony)
Strings
- Usually made with a multi-strand metal core plus two layers of metal windings on the exterior.
- Sometimes the core is a twine made from gut, or synthetic (especially nylon)
- Metals used can include steel, copper, chrome, aluminium, silver, gold, tungsten.

A Brief History of the Violin Family
The violin is a descendant from the Viol family of instruments. This includes any stringed instrument that is fretted and/or bowed. It predecessors include the medieval fiddle, rebec, and lira da braccio. We can assume by paintings from that era, that the three string violin was in existence by at least 1520. By 1550, the top E string had been added and the Viola and Cello had emerged as part of the family of bowed string instruments still in use today.
It is thought by many that the violin probably went through its greatest transformation in Italy from 1520 through 1650. Famous violin makers such as the Amati family were pivotal in establishing the basic proportions of the violin, viola, and cello. This family’s contributions to the art of violin making were evident not only in the improvement of the instrument itself, but also in the apprenticeships of subsequently gifted makers including Andrea Guarneri, Francesco Rugeri, and Antonio Stradivari.
We hope you found this informative! If you have any questions, or want to learn more about this fascinating process, chat with our team of friendly players, makers and educators today.